How to Sign A PDF on Mac
These days, people conducting business rarely bring paper documents with them. Instead, they would be carrying only their phones or laptops, which would be the […]
Read more

eSignature software


These days, people conducting business rarely bring paper documents with them. Instead, they would be carrying only their phones or laptops, which would be the only thing you see.
Online paperless documents are quickly becoming popular with many businesses, transactions, and agreements, primarily because of their convenience, easy process, and cost-effectiveness. When it comes to signing and sharing documents between involved parties, it’s quite expected for this to happen, as it guarantees authenticity and security from start to end.
For Mac users, signing documents, particularly PDF files, is made much easier by using a built-in software called Preview. It allows you to quickly create and save your electronic signature by placing directly on your PDF document.
But other than the Preview feature, there are still other ways to electronically sign a pdf file. If you want to know more, this article will give you all the important details.
The Portable Document Format, or PDF, is a versatile and standard file format created by Adobe that basically gives people an easy, reliable way to present and share documents – regardless of the hardware, software, or operating systems used by the viewer.
They can be signed electronically, and the reasons why people should sign PDFs electronically are provided below.
Electronic signatures are widely accepted and more secure than traditional paper-based signatures.
Compared to a written signature, electronic signatures are the quickest and easiest way to sign documents, most especially a PDF document.
Whether for business or personal transactions, e-signatures are considered legal, trusted, and lawfully binding in many countries.
No printing is necessary for a virtual signature, which means you save time, money, and effort (as well as paper and trees in extension).
Using practically any device, you can work efficiently and securely from anywhere.
Yes, you certainly can–luckily enough for you, it’s easier to sign a PDF on Mac. Mac users have the advantage of pre-installed software like Preview, which is not available to other operating systems such as Windows.
In this section, we will show you three simple methods for making a signature on a Mac. Click the Show Markup Icon resembling a crayon or pencil in the Preview app on your Mac. If the Markup toolbar isn’t showing, select the View option and click Show Markup Tool. A Create Signature option should show in the toolbar, and click on the signature icon.
To create a signature via trackpad, click Trackpad > the text as prompted and sign your name on the trackpad using your finger. Press any key and then select Done. You can also hit Clear and redo your signature until it’s perfect.
Note: If your Mac has a Force Touch trackpad, you may have to press your finger more firmly on the trackpad as you sign to produce a heavier, darker line.
To create a signature with your Mac’s built-in camera, click Camera. Write your signature eligibly on white paper and hold it up to face the mac’s camera, ensuring that the signature is leveled with the blue line in the window. Click Done when your signature appears in the window.
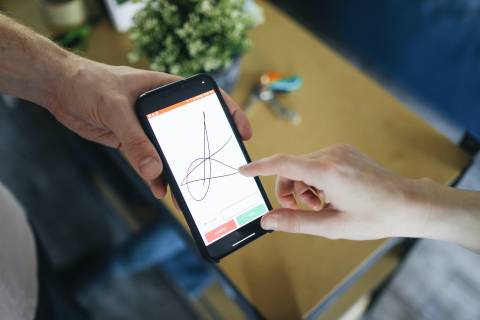
If you want to create a signature through iPhone or iPad, click Select Device to choose which iOS or iPadOS device you want to connect to. Use your finger or an Apple Pencil (for iPad only) to write your signature on your device, then click Done.
In the first place, you won’t really need a third-party app or online service to sign your important documents — there’s a conveniently built-in macOS tool to help with that. To sign PDFs, you can capture your signature via your trackpad, the built-in camera on your Mac, or your iPhone or iPad. Here’s how:
Open Preview on your Mac and select the document or PDF file you want to sign.
Click on the Show Markup Toolbar button, located in the rightmost button on the toolbar before the Search tool, to reveal the Markup Toolbar. Then, click the Sign button.
Follow the on-screen instructions to create your signature using your trackpad, iPhone, or iPad or holding up a signed piece of white paper to your camera to capture it as a regular picture.
Once the signature is captured, select it from the Sign drop-down menu and add it to the PDF.
From there, it’s all about resizing your signature by dragging on the adjustment handles and placing it where it needs to be. After that, you can save your PDF and consider the job done.
Quick note: If you use iCloud Drive, your electronic signature will automatically be available on your other Mac computers. You are also able to create multiple signatures at once.
In this section, we have included a few mobile applications and websites that provide online document signing services and other related features suitable for mac OS. The electronic signature provider will instruct you to upload the document, sign the document online and download the signed document. The documents that can be uploaded can be PDF, Word, IMG, TXT, XLS, and more.
Features include
Features include:
Features include:
Features include:
Features include:
The ability to create, save and add e-signatures to your PDFs is readily available to mac users. Deciding to sign your documents electronically can serve many benefits, namely for its validity, safety, and security, as well as its quick and easy process.
Because there is no printing, transportation, or an extra layer of physical security for traditional, paper-based signatures, there is less hassle and a noticeably lower expense rate. You can create your e-signature in Preview, the integrated software for Mac, or you can use a trusted and dedicated document management platform to perform the same operation, resulting in your very own safe and verified digital signature to use on any document.

As governments impose various restrictions and safety protocols in response to the COVID-19 pandemic, businesses and consumers are turning to technology for more secure products and services. This has also triggered an increased demand for online services like online notarization.
Online notarization is a new service offering that eliminates the need for paper-based notarizations. Another term for it is remote online notarization. It is essential to know what online notarization is – especially if you plan on using this service but don’t have a background in notary work. Before we give you the answer, we’ll first lay the groundwork by giving its precise definition.
The concept of remote online notarization (RON) was first proposed by the National Notary Association (or NNA) in the 1990s. It became popular in the 2000s when more people started using electronic signatures and digital documents for business transactions. Currently, remote notarization is a growing trend in the United States. The NNA reports that there are over 300,000 notarial services operating in the U.S.
Remote online notarization is quickly becoming a popular authentication method because it is fast and convenient. The convenience of remote online notarizations is that you can access an electronic document more quickly from the comfort of your home or office, unlike traditional notary that are in-person and can be time consuming. With the click of a button, you can also get your document notarized virtually anywhere and anytime.
The process of remote online notarization is simple. A third-party provider will be responsible for the electronic notarial certificate. The notary will use an electronic signature to authenticate the notarized documents and then send it to the client’s designated email address or upload it to a secure cloud storage system.
The main benefits of remote online notarization include:
The process of online notarization is the same as traditional notarization, except that online notaries work online using audio-video technology. An online notary verifies the signer’s identity and ensures that the signer understands and is willing to sign a document. Once the identity proofing is done, an electronic signature is made by attaching an electronic seal and digital certificate to the document.
Besides its convenience, this is a secure and efficient option for signing documents since you can complete them at home or in the office while meeting your notary remotely.
Remote online notarizations are legally valid and can be performed by a remote online notary public. To start performing online notarizations, the notary needs to have access to a computer, reliable Internet connection, fingerprint scanner, and other hardware. All documents that will be notarized need to be readable in electronic format—that is why it is best if you scan them first.
The process of remote online notarization is as follows:
A formal order of “remote” notarization shall be issued if no defects are found in the notarial certificate before submission to a company holding an online notarial seal.
Compared to traditional paper-based notarizations, remote online notarization saves time and money for both parties involved in the transaction.
As the name suggests, remote online notarization is online notarization that takes place remotely. RON may be distinguished from another form of notarization online called “electronic notarization” or “e-notarization.” While both require the notarization of electronic documents, they operate differently.
Remote Online Notarization is the process of notarizing a document in one location and then having that notarization acknowledged in another remote location. This is done by an online notary service provider who provides the necessary technology infrastructure for the remote notarial act to be completed.
The two parties will use a mutually agreed upon identification process to establish their identities, such as video chat, email authentication, and other verification methods. The notary will then proceed with performing their duties remotely, electronically signing and stamping the document in question.
On the other hand, electronic notarization follows all the normal procedures for notarizing a document. However, the notary will meet with you to draft a will using a digital platform. And allows the parties to sign their names electronically instead of with ink.
This only means that the will is drafted online, and the signatures are electronically inscribed on the document. The notary will help verify the authenticity of their signatures, validate that they are real people, and authorize them to act on behalf of the other parties involved in the will.
To summarize, the difference between online (remote) notarization and electronic notarization is that the entire process is done online for online notarization. In contrast, for electronic notarization, the signer must be physically present at the exact physical location as the authorized officer.
Remote online notarizations can only be performed by legally commissioned notaries publicly authorized to perform them. These legally commissioned notaries who are authorized to perform remote online notarizations are called remote online notaries, remote notaries, or online notaries.
Online notarization services are provided by various organizations and individuals, including traditional notaries. The most common notaries are online banks, which use their technology to process customer transactions. Other online notaries include travel agencies and property management companies. Any qualified notary public registered with the NNA and met the conditions set forth by the NNA Board of Directors may conduct an online notarization.
However, not all Notaries can perform online notarizations. To offer this service, you must live or be approved to work in one of the states where remote online notarization is legal.
Currently, online notarization is legal in the following states:
Aside from the states mentioned above, online notarization is legal in South Dakota but with limitations.
S.D. House Bill 1272 was passed during the 2019 legislative session and allowed for video and audio technology use. An online notarization (S.N.) can be performed remotely if there is an original tangible document to affix the notary’s signature, which is not the case with a true Remote Online Notarization. It would be better described as a remote ink-signing notarization.
Moreover, the following states are where remote online notarization is not legal or only temporarily allowed it:
Note: Remote Online Notary is not legal everywhere because every state in the U.S. has different laws and regulations on remote notarization. Some states have only temporarily allowed remote notary services, while others have specified that it is not legal. Check with your state’s Secretary of State’s office before utilizing Remote Online Notary services.
Here are the states that do not yet allow remote notarization:
Notaries interested in working as online remote notaries must know how they can do so. Two options to consider are working independently as an online remote notary or for a RON vendor. Working independently involves more work since you have to look for signers and negotiate a price with them yourself.
However, you have more control over your earnings as you may enter into contracts with whoever you like and charge the price that would benefit you best. If you prefer less work, working for a RON vendor is your best bet. They will take care of finding signers for you and deal with setting up appointments for signing documents for clients.
Moreover, an online notary commission is issued to the person who wants to become a notary. The Secretary of State issues the document, certifying that the person has been appointed as a notary public.
The convenience and flexibility of online notarization make it a popular choice for notarizing documents. It offers many advantages over traditional in-person notary services, with convenience’s main benefit. It saves time and money, reduces waiting times, and provides instant access to a notary. However, the limitation of remote online notarization is that it is only available for certain types of documents in certain countries. It does not provide a physical signature to prove authenticity. And last, it does not provide the same level of security as a traditional in-person visit with a public notary.
Today, remote notarization is changing the way that legal documents are created, signed and delivered. Prospective clients have more options than ever to conduct important business online. Find an online notarization service that will save you time and money.
However, even though you may be in a state that doesn’t allow remote notarization right now, you can still learn about how the technology works. If RON is right for your business, now is the time to learn more about it and prepare for how it may impact your operations in the future.
![]()
Depending on the nature of your organization, roughly half of your documents will require signatures, which take time to send, print, sign, scan, and return. Once signed, multiple parties will have to collect and file these physical files until who-knows-when. Signed documents will also have to be kept organized and visible at all times. Isn’t it more convenient, efficient, and cheaper to carry out this entire signature process digitally?
Create a streamlined document management workflow with other users using Microsoft SharePoint and add a digital signature seamlessly to Office files, including Word, Excel, and InfoPath!
A web-based collaboration system, Sharepoint workflows empower business teams to collaborate using workflow applications, list databases, and other web parts and security features. The features of Sharepoint workflow are centered around an intranet-based cross-collaboration experience that enables secure sharing, content management, and workflow collaboration features, among many others.
Here are some great reasons to use SharePoint:
The main difference between them is that to run SharePoint, you’ll need more room (metaphorically and literally). The IT team maintains it routinely to keep up to date with the patches and other updates, resulting in a need for more personnel and hardware.
However, in SharePoint, the size and number of packages are considerably reduced, and updating no longer requires downtime. When you choose SharePoint, you will have to pay for hardware and licenses and keep up with maintenance.
With SharePoint Online, your internal resources are reduced; there’s no hardware to buy, which means the IT pros you already have can continue working at their top productivity level. SharePoint Online is updated automatically by Microsoft. Meanwhile, SharePoint Online is part of a Microsoft 365 plan and is billed monthly per user.
Before knowing the differences between a SharePoint List and SharePoint Library, let us first explain what they are.
A SharePoint List is a collection of content that has rows and columns, very much like a table in Microsoft Excel. SharePoint lists store information where you can add attachments, such as documents or images. You can share SharePoint lists with your colleagues, teams, staff, or other people who you have given access to. Common examples of Lists are calendars, task lists, contact lists, announcement lists, link lists, discussion boards, surveys, etc.
A list in SharePoint allows you to organize the information dynamically and flexibly. You can create a list from scratch or use a ready-made document template. Once you have created SharePoint-related Lists, you can add SharePoint columns and create views to display data effectively.
Additionally, you can sort, group, format, and filter available lists to display the most important and needed information. Further, you can automate a list to save time, reduce effort, and streamline your work.
What makes a SharePoint list so popular is that anyone with the necessary credentials can access it from anywhere. They’re highly compatible with all of the latest Microsoft products, thus making them ideal for both individuals and teams to affix their digital signatures and manage information efficiently.
On the other hand, a SharePoint Library is a container or a special kind of list where documents or files are stored. SharePoint libraries are also commonly referred to as Document Libraries. Here, users can create, organize and manage different types of sharepoint documents, as well as collaborate with team members on them. You can store here various types of files and their meta information. Meta information helps team members easily locate and identify files to work on later.
Using SharePoint libraries, you can view a list of documents and files along with essential information about these documents and files, such as who last modified them. Users can create, store, and manage documents, spreadsheets, presentations, forms, images, and more in a SharePoint library, whether Word documents, Excel spreadsheets, or PowerPoint presentations.
In a SharePoint List, users can directly edit any item from the list. Here, they will not find any option to check out the item and make changes, as users can edit it directly. SharePoint lists do NOT support check-in and check-out features.
On the other hand, SharePoint Libraries support the check-in and check-out features. When users select any document in the library, they will see options for check-in and check-out. It is considered one of the most important documents management features.
SharePoint Lists can have only major versioning. When users go to List Settings – Versioning, it allows them to specify whether they want to version or not. Here, they can only enable major versioning. However, when users go to Library Settings – Versioning, they can set both major and minor versioning. Moreover, users can specify the number of versions to retain for minor and major versioning.
Documents added to Lists as attachments aren’t indexed by SharePoint when users add them as attachments. Accordingly, they will not be shown in search results. On the other hand, if users search for a keyword in a document Library, they will see the document shown in the search results as it crawls.
Users can add a document as an attachment to the List item and add as many documents as they want as attachments. There is no maximum limit to it. Users should note when they are in mobile view, they can only see a maximum of 3 attachments on the platform. On the contrary, users cannot create an item in a SharePoint Library without a document. Here, users will save the document itself as an item in the library, and they can specify the metadata for the document.
While document sets aren’t available in SharePoint Lists, users can use the document sets with the Libraries to organize related documents. Document templates are not supported in a SharePoint modern List, while users can store documents as templates in SharePoint Libraries and can set the header and footer and customize it further.
The Sharepoint Collect Signatures Workflow allows you to embed signatures within Word, Excel, and InfoPath documents and share them with multiple individuals.
While logged on to SharePoint as an Administrator, make sure Collect Signatures is enabled. The following steps illustrate how to use SharePoint Online:
The following applications have E-Signature Software Integrated with Microsoft SharePoint:
![]()
The Adobe Sign integration for Microsoft SharePoint provides an integrated solution for creating, sending, tracking, and managing electronic signatures in a sharepoint document. The integration is available for Microsoft SharePoint 2013 or 2016 on-premises instances of SharePoint.
![]()
Multiple methods of user authentication. Use and save templates to automate future transactions and archive an electronically signed document in SharePoint online. Easily manage users, permissions, text tags, conventions, and more from the admin dashboard.
![]()
Through DocuSign for SharePoint Online, organizations of all sizes can securely send, sign, and track documents from any SharePoint Online document library – almost anytime, from almost anywhere, on most devices.
Other applications include pdfFiller, signNow, Nitro, SigniFlow, Signority, Zapendo, frevvo, GetSig, MOXIS, Webdox, Send2sign, airSlate, Plexus Gateway, among others.
Despite being a niche under Microsoft Office, Microsoft SharePoint is a great web-based application that allows users in the company to collaborate and express their ideas with minimal cost. It is cost-effective and easy to use, making it a good choice for small and large companies. Users can log in on the web and start working together right away, and Microsoft SharePoint is included in the Microsoft Office 360 package or Office 360, which is billed monthly.
However, keep in mind that while Microsoft SharePoint seems to be a complete package, Microsoft itself handles all the updates, patches, and maintenance of Microsoft SharePoint. For this reason, the company must adjust so that users can save their work before these updates start. It also only does the basics of web-based collaboration, so it can’t compete with programs for a specific company type.
As the name implies, an electronic signature is a signature that is stored and transmitted in electronic form. As with wet signatures, it allows signatories to approve or agree with the terms of a document. In electronic signatures, computers are used to verify the identity of the signatory and the integrity of the document.
So, are electronic signatures secure? Of course they are as they are backed by technology to ensure the authenticity of the signatures.
Electronic signatures speed up approvals and agreements by eliminating idle periods from the process. It’s quicker and easier to send documents by electronic signature than to send them by mail or drive to a drop-off point.
Electronic signatures also make the signing process much more manageable. Since electronic signature solutions are so portable, you can sign or request signatures from virtually anywhere in the world using your preferred gadget or device.
Moreover, since many electronic signature solutions will only let you submit a document once each signature field is filled in, you don’t have to worry about minor errors becoming major headaches.
Documents sent online can be signed electronically, eliminating the need to sign paper documents with a wet ink signature. Here are some exceptional uses of electronic signatures:
Lawyers, investigators, attorneys, and other players in the legal industry sign documents on a daily basis. In the practice of law, an electronic signature saves you a lot of time compared to handwritten ones. Furthermore, legally binding electronic signatures are convenient and admissible in court, making them ideal for common legal agreements such as licensing of intellectual property and non-disclosure agreements.
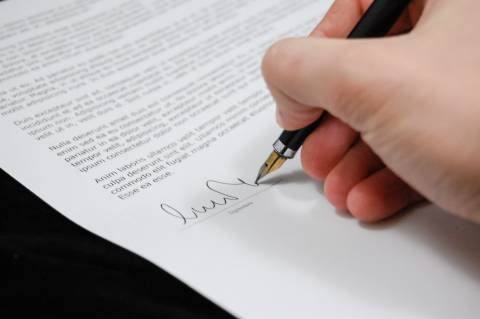
A wet signature is created for a person to sign documents. It is often done by writing a name (or even a simple “X”) in a stylized, cursive font. It is similar to what other cultures do with name seals. In both cases, the word “wet” implies that the signature takes time to dry, as it was created with ink or wax.
An electronic signature is a digital representation of a person’s intent to agree to the contents of a document to which the signature pertains. In the same way as a handwritten signature, an electronic signature demonstrates an individual’s intent to abide by the terms of the document signed.
Among electronic signature types, digital signatures are considered the most secure electronic signature. For verification of the legitimacy of the signator (the author and owner of the signature), the digital signature includes a certificate of authority, such as a Windows certificate.
A digital signature also allows both parties to determine whether a signed document has been altered in any way that renders it invalid. While electronic signatures are often used synonymously with digital signatures, most electronic signatures lack the security features of true digital signatures.
Simple electronic signatures are the broadest type of electronic signature. They are defined as “data in electronic form which is attached to or logically associated with other data in electronic form and which is used by the signatory to sign.” In many cases, simple electronic signatures are considered legally binding. However, for specific documents, higher qualifications must be met.
Advanced electronic signatures are signatures that have an “electronic seal” attached to them. In other words, they are transmitted via an “electronic registered delivery service” that can provide evidence regarding handling the transmitted data. These signatures are typically certified by an independent Certificate Authority.
Qualified electronic signatures are advanced electronic signatures that meet additional requirements. A qualified eSignature, for example, must have a certificate based on public keys stored on a cryptographic card (or equivalent device) with a double authentication factor. There also must be prior identification of the signatory by an audited entity.
There are various ways to create and change electronic signatures. A handful of electronic signature software provide services that allow creating and changing an electronic signature. These methods are:
It’s the most common method for users to make an electronic signature. It is pretty simple as it uses an actual handwritten signature and only needs to be digitalized through scanning. While it is simple and straightforward, it might be less convenient once a user learns how to create an electronic signature using other methods. The signature is not secured either since users will not have a digital ID or a digital certification that proves its authenticity.
You can apply your signature to a document in several different ways using Adobe Acrobat Sign.
Consequently, users can replace their signatures by:
It is also possible to manually draw your signature into the box if you use a touch screen. If you prefer, you can type your name directly into the box.
Mac users can easily and quickly sign PDF documents using Preview. To create your signature, you can use your computer’s built-in camera or trackpad to create a PNG-friendly version.
If your Mac has a Force Touch trackpad, you can use more pressure to make a thicker, darker line when signing.
Use the handles to adjust the signature size after you’ve chosen it. Drag it to where you want it, and the signature should appear where you want it.
With the rise in demand for workflow automation and SaaS technologies, an increasing number of organizations, ranging from small businesses to multinational corporations and even government agencies, have adopted electronic signatures. And why wouldn’t they be when its legality is clear, its benefits are numerous, and the risk is low? Surely, you can’t miss leveraging this modern trend for your own purposes.
You may not even realize it, but you likely use various APIs daily. APIs are not only becoming more popular in the tech industry, but developers are also using them more frequently now. In case you didn’t know, popular applications like Facebook, Gmail, PayPal, Twitter, and others use APIs to enable various functions.
With electronic signature software becoming a standard tool for businesses to automate the signing process, it has become extremely important that eSign procedures support and enhance workflows. Here, the use of APIs such as Foxit eSign becomes essential.
So how are APIs used for electronic signatures, and what are their key benefits? Let’s look for answers in this article.
API stands for Application Programming Interface, which provides communication and contract between various software products and services. Developers use a set of programming codes to transmit data and interact with other software resources electronically.
In the context of APIs, the term Application refers to any software that performs a specific function. An interface can be viewed as a service contract between two applications. APIs contribute greatly to the quality of users’ experiences in business operations. APIs manage the data needed to give solutions to any customer-related problems through the request the client makes via the Rest API.
Clients and servers are terms commonly used in API architecture. An application that sends a request is called a client, and an application that responds is called a server.
For example, the weather bureau’s software system contains daily weather data (server), and your phone’s weather app “talks” to this system via APIs and displays daily weather updates (client).
To effectively do that, API endpoints play a vital role since they are the location from which APIs (the code that communicates two software systems) can send requests, access the resources they need, and receive a response.
Business transactions and agreements that were once made legal through signing physically-delivered contracts are now replaced by a mechanism of electronically signing using esignature APIs. Electronic signature software helps users sign documents efficiently, safely, and legally without the risk of fraud and document tampering, which significantly provides a better user experience.
Documents are prone to tampering by malicious parties; to ensure this does not occur, Esignature API authenticates important business documents with an API key aside from making signature requests directly accessible from your web applications. In just minutes, you can integrate eSignatures into your own applications so that data and document signing are delivered securely.
An encryption algorithm is used to create a unique digital fingerprint or a hash in a document—and altering it will completely change the hash. The API key is essential in the signing process through the generation of digital signatures since it proves that a document was not modified. When the hash is generated and encrypted by the signer’s private key, the encrypted hash and the public key are combined to create a digital signature, which decrypts the data so the servers can verify any site-generating requests are authorized to be made.
Digital signatures are the new and advanced alternative to signing documents instead of pen and paper. The validity, authenticity, and integrity of electronic messages and documents are given paramount value, and the contents of messages are guaranteed unaltered during transit. Forgery and information tampering will thus no longer be a problem.
A digital signature is indeed beneficial when handling the bustle of the business, and all signed documents with e-signature API are legally binding and, therefore, acceptable in a court of law. Highly secured document signing with digital signature API allows you to add electronic signing capabilities to web applications and business processes.
Digital signatures provide highly-relevant additional information, such as the message’s origin, status, and consent by the signer. That’s why the system handles notifications once integrated via the API, and the audit trail logs everything, including the signer’s activities and workflow updates. In this regard, choosing the best digital signature API is crucial.
Below are some of the best E-signature APIs for your business needs:
![]()
Sharing signed documents and templates has been easier with their accessible cloud, which is why it is best for solo business owners and freelancers for their unique needs.
![]()
It is best for businesses with many necessary contracts since it allows users to request signatures, sign contracts, get updates securely, and download completed documents.
![]()
A faster electronic signature boosts users’ productivity. PandaDoc’s user-friendly interface facilitates a better experience for clients.
![]()
SignNow’s eSignature API empowers users to complete entire document lifecycles quickly. With signNow, you can quickly send documents for signature, request payments, create reusable templates with fillable fields, and monitor the status of documents in real-time.
![]()
Its extensive feature makes complex signing workflow easier and lets users facilitate digital documents while electronically signing them.
Electronic signature software has remarkably improved productivity across various organizations and departments, especially when a physical meeting is impossible. The usefulness of digital signatures has come in handy to satisfy different data intentions, such as to accept or decline, amend or approve, or achieve any course of action. Integrate signature APIs into your business operations to avoid the traditional paper-based, time-consuming signing process because with it, you can do the signing process can on the spot!

Now that most of our daily hustles are done online, our means of communication have also gone digital. Thanks to the internet, we have transitioned from simple text messaging to using various online communication apps.
And then there’s email – a more personal and direct medium of communication used for different purposes. You can use your email to send updates to family, request signatures from business partners, sign up for accounts on websites, and send online documents, among other things. Since anyone can use email for any purpose (academic, legal, personal, etc.), it quickly became a preferred electronic communication method. So whether you’re distributing newsletters, applying for jobs, requesting legal documents, or asking for feedback from your supervisor, you can do it all via email.
If you’re assigned to writing numerous emails regularly, you can include an electronic signature to save time on writing it yourself. By keeping your own signature and including it when you want to, you’ll always have the correct information available. Let us show you how in this article.
An email signature is an online signature that serves as your verification identity. It includes your name and other important information about who you are and how the recipients can recognize you.
Email signatures are more prevalent in business and legal transactions due to their many advantages compared with paper-based document signing using a handwritten signature. For instance, signing digital documents using electronic signatures in Gmail reduces costs, saves time, and gives you the flexibility to sign documents from almost anywhere on most devices. It is also legally binding in most countries, such as the United States and Europe.
Today, Gmail has become one of the most preferred email providers for small and large businesses, owing to the extensive features available to anyone with a gmail account. Among these features is the ability to use email signatures in business email communications.
Digital signatures in Gmail can do much more than you think. For one, it makes you easily recognizable to your recipients; your email signature will stand out more if it has your email id, contact number, business details, etc. It doubles up as a visiting card because they give your recipients – whether they be business contacts, friends, relatives, leads, prospects, customers, and others – the valuable information they need to reach you. Plus, your emails won’t be flagged as spam since Gmail signatures provide invaluable authenticity by proving to your recipients that your email is genuine.
In this section, we will show you the steps to create your own digital signature.
Step 1. Open and log into Gmail in a new tab in Google Chrome.
Step 2. Under the General settings, scroll down to the ‘Signature’ section in the Gmail Settings tab to make a new Gmail Signature.
Step 3. Proceed to make your signature and personalize how the text looks.
Step 4. Hit ‘Save Changes’ for your Gmail signature to take effect.
Step 1. Go to the Settings option in Gmail and select the image icon next to the hyperlink button under Signature.
Step 2. You can insert an image from your Google Drive or upload it from your computer, or even enter a URL from the web.
Step 3. Resize the image as you like.
Step 4. Save your changes at the bottom of the webpage, and you are all set.
A quick tip for designing your signature is to make it minimalistic and straight to the point. No one wants to look at a business card that looks compact and full of unnecessary information. Only include the essential information you would like your recipients to know the most before anything else, such as your email id, contact number, business details, etc.
If you use Gmail as your primary email provider and file-sharing platform, you probably don’t want to leave your browser in the middle of the day to sign and send documents. Good thing it’s possible!
If you’re wondering how you can add a signature in Gmail to sign and send a document quickly, here’s how you do it:
Step 1. Use the Gmail Inbox add-on for the Esignature app.
Step 2. Link it to your email account.
Step 3. Open the email with the attachments that you want to be signed.
Step 4. Click on ‘Sign’ and then click on ‘Sign Yourself’.
Step 5. Choose whether to draw, type, or upload a signature image.
And that’s it – your signed document is ready to be sent! Also, signing in to Gmail is made easy with a Gmail add-on.
If you need to sign a pdf file in Gmail, there is a method for that as well. Signing pdf documents online is extremely simple, but you must have an electronic signature software integrated with your email. To sign the PDF document, open the email with the PDF attachment, click “Sign now,” and click anywhere on the PDF document. Once that’s done, you will be redirected to your Gmail inbox.
If you’re looking for electronic signature software that offer online document signing services and other related features in Gmail, below are some of the top names:
![]()
Step 1. Log in to DocuSign eSignature.
Step 2. Click on New Signature.
Step 3. Sign a Document and then upload the electronic or pdf document.
Step 3. Click Sign and then follow the steps to sign documents.
![]()
> Fill & Sign.
![]()
Step 1. Sign up to PandaDoc and click New Document.
Step 2. Click the Upload tab and upload your digital document.
Step 3. Drag-and-drop the Signature field wherever you want on the document using the Toolbar on the right.
Step 4. Click the signature box and select yourself as the recipient (you may need to enter your
details as a new contact if your details are not already in the database).
Step 5. Then click the signature field again to create your signature by either drawing it by hand,
uploading an image or typing it manually.
Step 6. Click the Complete icon and download it in your preferred format or directly send it to the original sender.
![]()
Step 1. Install Signeasy’s Gmail Inbox add-on.
Step 2. Link it to your email account.
Step 3. Open the email with the attachments that need to be signed.
Step 4. Click on ‘Sign’ and then click on ‘Sign Yourself’.
Step 5. Choose whether to type, draw or upload a signature image.
Here’s how to create a Gmail signature using Google Chrome Browser:
Step 1. Open Gmail.
Step 2. In the top right, click Settings and then See all settings.
Step 3. In the “Signature” section, add your signature in the signature line. If you want, you can edit your message by adding an image or changing how the text looks.
Step 4. Scroll down and click Save Changes.
Step 5. Manage multiple signatures
Step 6. You can also use different signatures for your emails. For instance, you can set a signature default for new messages you compose or reply to. You can do that or choose a different signature with every email you send.
A quick tip: If you want to change your signature while you create a new email, look at the bottom of the window and click Insert signature pen.
With digital signatures in emails, you’ll be able to speed up the signing process and eliminate the need for meetings, in-person signatures, and the paper process that comes with them. Now, you can accelerate document signing workflows, execute transactions with trust, eliminate manual signatures, and improve business productivity. By following the steps and tips outlined in this article, you can spare yourself the hassle of typing your email signature in every new message.
Signing and going through paperwork is tough work. You flipped through stacks of paper one by one, looked for signature lines, and signed each by hand over and over until your wrists started aching, and you could barely keep up. For decades, that has been the only procedure to get things done. But with the advancement of technology, modern solutions emerged, and eSignature technology became the lifesaver for business owners, contractors, signers, publishers, and anyone else who constantly deals with paperwork.
By digitally signing, you can reduce costs and operations, such as printing, scanning, faxing, overnight delivery, and traveling, compared to paper-based methods. From emails to a sales contract to other legal documents, it’s possible to sign them all without the need for in person signing. With just an electronic form and a personal electronic signature used within a trusted online signing software, the entire deal can be initiated and completed electronically via the internet and nowhere else.
In this article, we’ll walk you through the signing process of online contracts, its legality, its key benefits, and the most trusted e-signature software to make it possible.
Online contract signing can be done in a few different ways, but the first step is always to find a trusted e-signing application or website and follow the instructions. In the case of most platforms, it’s typically a straightforward process. You sign up for a free trial, and shortly after, you can go ahead and upload a contract, prepare it for signers to sign, and send it to the recipients as prompted. You will be finished in no time as soon as you fill out the necessary information.
There are various ways you can sign contracts online:
Signing a PDF contract online undergoes a similar fashion. Just upload your contracts to your preferred e-signing service, such as HelloSign, Adobe Sign, or DocuSign, and electronically sign them when ready.
When you are a contractor, your job is to request signatures from relevant parties and organize the contract’s content details before sending the online contract.
The steps to add signers and start a signature request would vary from creating and adding your signature to a contract, but the flow will be similar enough not to give you a hard time.
Step 1. Open your preferred contract program.
Step 2. Upload the contract file to the program.
Step 3. Fill in necessary information such as names, email addresses, and others.
Step 4. Identify the signature fields where you want eSignatures, initials, and dates to appear.
Once the contract is ready, the program will send it to the signers’ emails, prompting them to create and add their signatures on the signature fields. Once the contract is completed, a confirmation email will be sent to all parties involved with a link to download the final contract.
Yes, it is 100% legal. Not only contracts but any online document can use legally valid and enforceable electronic signatures, provided the electronic signatures comply with the rules of the UETA and/or the ESIGN Act. Handwritten and digital signatures are given the same legal status under state law. Also, it’s good to know that electronic signatures and their legal validity can vary by continent, country, state, and sometimes even locality.
For instance, in Europe, the electronic signature is regulated by the European eIDAS regulation (2014), and in the United States, the Electronic Signatures in Global and National Commerce Act (ESIGN) are in effect.
When signing a contract electronically, be extra cautious about the e-signing platform or software you use. There are hundreds of digital signing services out there that claim to give “great, reliable service” to everyone, but in reality, they aren’t capable of providing all the essential features for a safe, secure, and smooth workflow.
For an e-signing app to be safe, it must:
Electronic signatures combined with sealing, strong authentication, security, and an audit trail have a more weighty evidentiary value than a scanned image of a document with a signature.
Furthermore, while there are e-signing websites that offer a free plan, it may be wiser to choose a paid plan instead, especially if your contracts contain highly sensitive information. E-Signature software that offers premium plans goes out of its way to ensure users’ safety, which is typically not the case with free tools. Saving a few dollars at the expense of valuable security will cost you more in the long run if your contract is tampered with.
Remember: Above all, prioritize safety and security because if a dispute over the signed contract arises and goes to court, the judge will always look for the trustworthiness of the authentication method.
There’s no doubt that online contract signing has more to offer than traditional paper methods. Professionals are empowered to get work done faster with the help of e-signing technology. It’s more convenient, innovative, and less hassle than other ways. By using electronic mobile apps, you can check your document status directly from your devices after preparing and submitting electronic documents.
It may seem like a challenge to train yourself or your team to switch to digital procedures, but the payoff is absolutely well worth it, and here are the key reasons why:
One of the primary benefits of online contract signing is that it allows users to sign and return documents across any device from anywhere in the world. Mobile devices are compatible with many document signing programs, so almost any recipient can sign the document in real-time. This method is much faster than mailing a physical contract to each recipient and waiting for return mail from multiple sources.
Online contract signing ensures better security when compared to physical contracts. After you and the recipients sign the contract, many programs prevent anyone from making further changes. There are some other great features, too, like audit trails, a built-in time stamp, and automatic reminders. This adds a layer of security that is hard to match with similar physical documents, which could possibly be changed because of printing mistakes or other means.
Online contract signing saves you time and money in several ways. First, it prevents you from creating multiple physical contracts for each person who needs to sign them, helping you save money on ink and paper you may use for your printer. They also save you time because they can reach recipients as soon as they have an internet connection. Finally, they decrease costs by preventing you from having to pay for postage or transport to new locations to sign documents.
There are a lot of e-Signature programs out there that let you sign a contract online. However, their set of features may vary according to their main purposes. Below are some well-known and trusted by millions all around the world.
As we all know, contracts help both parties align and understand what’s expected of them in their agreement. With secure and legally binding electronic signatures, you can work faster and more efficiently whenever you have a contract to sign. No matter where you or your partners are, as long as you have an internet-enabled device, you can sign contracts whenever and wherever you want.
Google Drive has changed the way we store and share documents with its free-to-use Suite of editing tools. One of its greatest successes is Google Forms, a part of the Suite that allows you to create surveys and polls easily and collect information in custom forms, checkboxes, and more.
Google Forms collects all your vital information and stores it as part of your Drive. If you’ve set up a Google account with two-step verification, you might need to change your settings to access your account from third-party sites like email or the desktop version of Gmail.
But what if you want to include a signature at the bottom of the online forms in addition to typing in your name? So here’s how to sign Google Forms with a different authentication method.
Signing documents online is easier than ever with the help of Google Forms and its electronic signature feature. You can add a signature field to your Google Form by following these simple steps:
Step 1: To install add-ons to your Google Workspace, click Add-ons from the menu in the upper left corner.
Step 2: Search in the Google Workspace Marketplace for a solution to your document signing needs. Make sure it’s free, easy to use, and provides legally binding electronic signatures.
Step 3: Install the add-on. Once installed, you should see an e-signature option in your document menu (next to Print or Save as PDF). This will take you back to your original form, where a new electronic signature field will be added as well as instructions on how.
Here are some of the best features of adding signatures to Google Forms using an add-on.
If you’re searching for a free way to collect signatures on Google Form, a few add-ons can help you out. However, these solutions have some drawbacks, though.
There are many ways to add a signature to Google Form, but the easiest way is using electronic signature tools. These tools allow you to collect legally binding signatures and other documentation on any document you upload and handle all of the steps involved in the process.
Electronic signature software makes it easy for you to provide excellent customer service by guiding your customers through the process. Even someone who has never used electronic signature software will find it easy to use.
Here are some of the best electronic signature tools for Google Forms:
1) Signaturely
2) AdobeSign
3) HelloSign
![]()
Google Forms makes it easy to collect data from your customers and employees. But what if you need them to sign something? This is where Signaturely comes in. With Signaturely, you can convert your existing Google Forms into legally binding contracts right from the platform.
Signaturely is a cloud-based SaaS solution that allows users to create and manage legally-validated signatures online. Here’s how it works:
![]()
Signing documents in Adobe Sign is a great way to authenticate the documents you sign. It’s also easy to show others that you’ve seen and signed a document, even if they don’t have access to the original draft.
When you create an Adobe Sign account, you’ll be able to add your digital signature to any document shared with you through the platform. This includes PDFs, Word documents, Google Docs, and more.
The steps below show how to add your Signature to Google Forms:
Step 1: Open a new form and click on “Signature,” located in the top-right corner of your screen.
Step 2: Click “Add Signature” and choose which device you’d like to use to sign the document (e.g., mobile device or desktop). You can also choose whether or not you want Adobe Sign to save your Signature across devices, which is useful if someone else needs access to it later.
Step 3: Choose where you’d like your Signature saved locally on your device or in Adobe Sign’s cloud storage system, and then click “Save.”
![]()
If you’re a Google Forms user, there’s no need to worry if you need to sign documents. The e-signature software, HelloSign, allows users to add their Signature to Google Forms easily.
Here’s how you can add your Signature in Hello Sign:
You can add this option to your forms if you want your signers to sign with their full names or initials. While this isn’t legally binding, it is an excellent way to show goodwill and that you’re taking their time seriously.
Here’s how:
The final option would be to give users the option of taking a photo of their signature and uploading it as a signature.
If you have a Google account, follow these steps:
The most significant upside to adding a signature field to Google Forms is that it’s straightforward. You must add a new domain and then ask the user to type their name. It’s simple, fast, and allows users to “sign” directly on the form.
The biggest downside is that this isn’t a legally-binding way to collect a signature. If you’re using your forms for legal purposes (like signing documents), then this won’t work for you. It also means that if multiple people are signing one copy or multiple documents, it will be hard to track their signatures or keep track of which document they signed where.
With over 1.5 billion global active users, it only makes sense to include an electronic signature in Google Forms because users can easily access the platform through their Google accounts. Overall, it is easy to set up an e-signature field in a Google Form.
Users have many options in terms of signing, and best of all, they can sign documents with their finger on a touchscreen or stylus on a tablet, altogether eliminating the need for a handwritten signature!
When signing online documents, a signature file with a transparent background is more favorable than one with a white background because it can clash with the digital document. If you’ve noticed also, transparent signatures look more authentic and professional on digital documents. One more thing – a transparent signature image does not affect your signature’s validity, so what is there to be concerned about using one?
Want to use a transparent signature in your next transaction? Read along as we show you different methods to create your own transparent signature in just a few minutes! The processes involved are simple and easy to follow, so you don’t need to be tech-savvy to do it.
If you prefer to digitally sign all documents, keep a copy of your signature in your signature gallery so you can quickly insert your signature into PDF files. There are times, however, when the background color of a PDF file is different from that of your e-signatures file. And so, you need to create transparent signatures to make your signing process effortless.
A transparent signature is particularly helpful when signing documents that do not have the same background color as your e-signature. How many times have you tried to add your e-signature in jpg format only to clash with the document format? This is where a transparent signature comes in handy.
With the emergence of e-signature solutions, creating a transparent signature has never been easier. Here are some of the best electronic signature providers you can use to create a transparent signature:
![]()
The Online Signature Generator from Signaturely is a tool that allows you to quickly and easily create a transparent signature online. The steps are as follows:
Step 1: Go to Signaturely.com and sign up for a free account. Signaturely offers three (3) free signatures for life for their Free Account users.
Step 2: Type or draw your signature. You can create your e-signature by typing your name, drawing a signature, or uploading an image without leaving Signaturely.
Step 3: Save your transparent signature for future use. Once you’re happy with how you’ve customized your signature, you can save it on the Signaturely platform to sign any document quickly and easily.
Step 4: Sign documents with your transparent signature. Congratulations! Your transparent signature is ready to be used. Select your signature image to sign any document digitally.
![]()
PandaDoc’s CreateMySignature is an online tool that enables you to generate digital signatures with minimal effort. Follow these steps to get a transparent version of your handwritten signature in no time:
Step 1: Open CreateMySignature.com.
Step 2: Choose Draw signature. This allows you to generate a downloadable image for use when signing pdf files and digital documents within major software applications such as Google Docs and Microsoft Word.
Step 3: Use your mouse or trackpad to draw your signature.
Step 4: When satisfied with the result, click Download signature to save your new signature. The image that will be downloaded to your device is a png file with a transparent background.

With a 30-day trial, WeSignature allows you to generate a transparent online signature. Here’s how it works:
Step 1: Go to Wesignature.com and sign up for a free account. Your account comes with four different plans, each with a monthly limit on free signature requests.
Step 2: Type or draw your signature. You can choose a signature font that meets your needs, from formal to handwritten. After that, you’ll have the option of changing the position and color of your signature.
Step 3: Next, save your online transparent signature.
Step 4: Now that you’ve saved your transparent signature, you can start signing documents with it.
You can also create your signature using the old-fashioned way: pen and paper.
Step 1: Draw Your Signature on a Blank Paper
Get a blank white paper and draw your signature. Make sure to use a dark in to reflect your signature clearly.
Step 2: Scan the Signature to your Computer
Scan your signature and transfer it to your computer. If you don’t have a scanner, several apps can scan documents using your phone, such as CamScanner.
Step 3: Remove the Background
Once you have scanned your signature, you will need to remove the white background of the photo. Free tools such as remove. bg lets you upload photos and remove their background for free.
Step 4: Save your Transparent Signature
Now, save your signature in a jpeg or png format. Congratulations, your transparent signature is now ready to use!
With the use of electronic signatures on the rise, it can be helpful to have a signature with a transparent background. Unlike a signature with a contrasting white background, a transparent signature makes your document look more seamless and professional. Having one will certainly help you close deals and manage your transactions efficiently, even when you are halfway around the world!

Over the last decade, businesses have realized that technology plays a huge role in our daily lives. That’s why one of the biggest technological advancements in business today is the iPad. Signing documents has been traditionally slow. Signing on paper is slow. And signing online can be tedious.
Marking documents you receive from clients or coworkers can be a bit of a pain, especially when the device they use to send the document is different from yours. You have no choice but to do it later on your computer — unless you have an iPad. Signing a document has never been easier. While a pen and paper is still the best way, if you’re doing this digitally on your iPad here’s a simple guide to signing on an iPad.
There are many apps that can help you sign contracts, but I’ve specifically picked out one of the best client managing tools for freelancers using iPads.
iPad has been growing in popularity for business use, and with good reason. It’s extremely portable, has a long battery life, and there are tons of apps that can make your work day more efficient. One of the biggest benefits is being able to sign documents without having to print them out or switch devices. You can also easily save and send the signed document back to whoever needs it.
Many of us have made the decision to forgo conventional tools in favor of contemporary, digital ones as the digital era has begun. Given that we frequently communicate with people who live far from us and that traditional methods of communication are insufficient, it makes sense. Therefore, we made the decision to assist you in finding a means to sign documents digitally instead of using a pen and paper, even when you’re on the road and surfing on your iPad.
Here’s how to do it with iPad:
When you are signing a PDF, Adobe Acrobat Reader is one of the most popular and easy to use options. Adobe Acrobat Reader is a free app, available for both iOS and Android devices. It is a reliable option for signing documents on your iPad. To use Adobe Acrobat Reader to sign a document, follow this instruction:
Signaturely is a free iPad app that allows you to easily sign documents on the go. It also offers features like adding dates, text boxes, and checkboxes to your PDFs. Apart from its free trial period, a good thing about this app is that you don’t have to check whether it’s compatible with different operating systems. As long as you have a browser and access to the internet, you’re ready to sign contracts online easily.
To sign PDFs on your iPad, you need to log in to Signaturely via your browser. You can use Signaturely for signing documents on your iPad, follow these steps:
DocuSign is a popular app for electronic signatures, available for both iOS and Android. It allows you to easily sign documents on your iPad as well as send them for others to do the same. You can upload PDFs or images from your device, Dropbox, Google Drive, or Box to sign them. This is a paid app, but it offers a free trial period and is trusted by many big businesses.
To sign documents on your iPad using DocuSign, follow these steps:
Signing documents using iPad pencil in your iPad is a quick and easy way to sign contracts or agreements. Before you start, make sure that your iPad is compatible with an Apple Pencil and that it has the Notes app installed. The Apple Pencil can be used in apps like Notability and Goodnotes, allowing you to easily write your signature on documents and save them as PDFs.
You can also email directly the document through the sent options before saving the doc. This method is the easiest and most used way in signing documents of the Apple users.
Another way to sign documents on your iPad is through the Notes app. This option allows you to not only sign documents but also scan them using your device’s camera. iPad notes is the manual way of signing documents. iPad Notes has many features including scanning documents and signing them on the go. This is also a free app for all Apple users.
Overall, signing documents on your iPad can be done in a variety of ways using different apps and methods. Whether you choose to use Signaturely, DocuSign, an iPad Pencil, or even the Notes app, signing important documents has never been easier with the convenience of technology at our fingertips.
Whichever method you choose, signing documents with an iPad pencil allows for a fast and efficient way to handle contracts on the go. Overall, these are just some of the options for signing documents on your iPad. Choose whichever option works best for you and start electronically signing documents today!


